
Logging In
- Navigate to http://asp.schoolmessenger.com/brownco
- Enter your username and password. If you don’t remember your username or password, please ask the Tech Dept to reset it for you.
- Click Sign In
Main Screen Overview
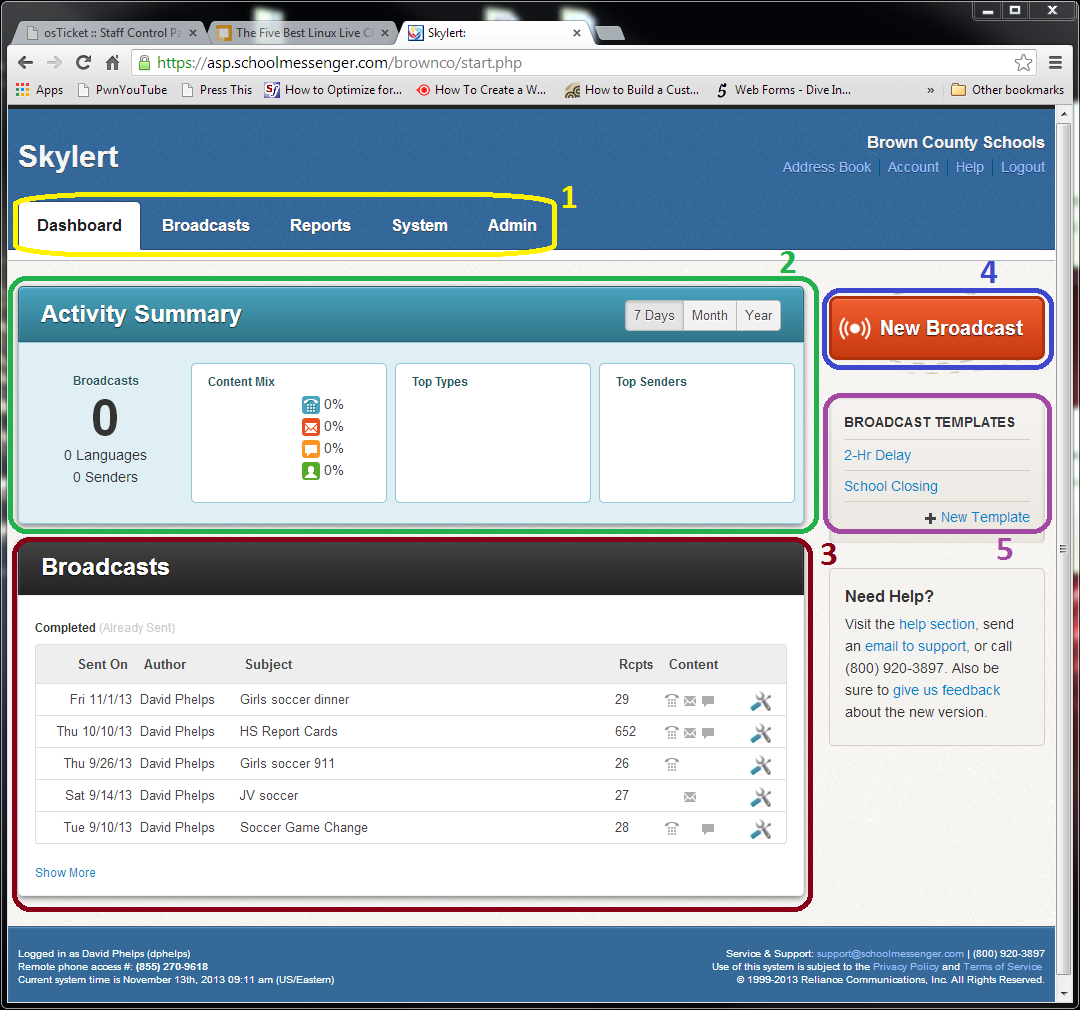
- Main Navigation – These tabs get you to different parts of the SchoolMessenger system. You may not have all of them because they are specific to your permission level.
- Activity Summary – This shows your recent activity in a graphical display. You can choose to view the past 7 days, month, or year.
- Broadcasts – This shows your most recent broadcasts including those still pending. You can review messages sent, view reports, and re-use broadcasts.
- New Broadcast – This is where it all begins. Press this button to start creating a new Broadcast message
- Broadcast Templates – You can create convenient templates if you send a similar message periodically and don’t want to re-add contacts and messages.
Sending a Message (phone, email, text, social network)
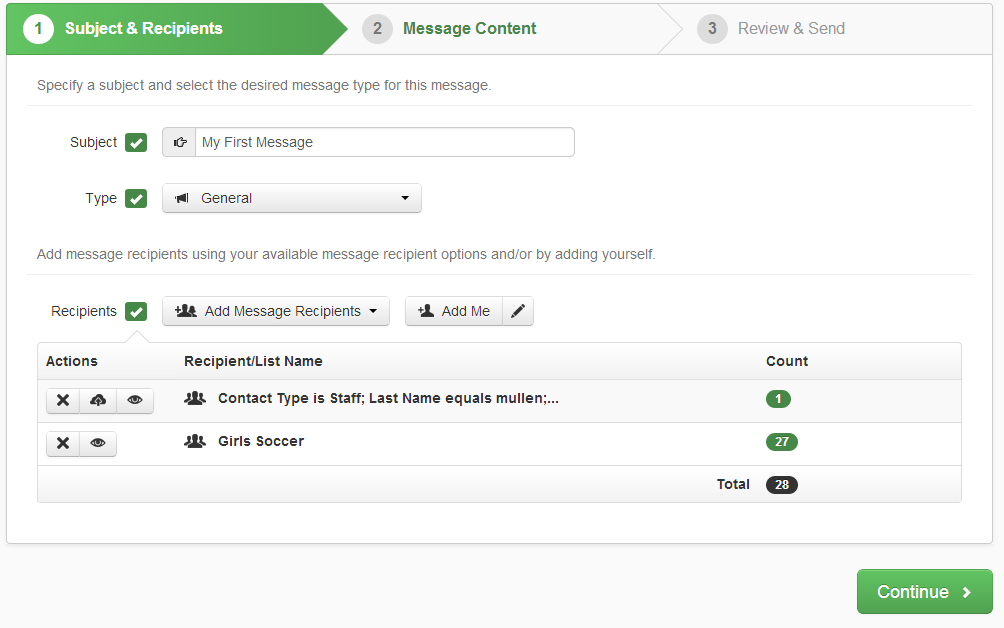
- After logging in, click the New Broadcast button. Wait for the message sender to load. If it does not load, refresh the page. Creating a message is a 3-step process. You select your recipients, create the content, then review everything and send.
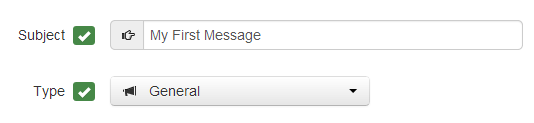
- Give your broadcast a name in the Subject box and select the message Type
- General – Most announcements and notifications
- Athletics & Extra-Curriculars – Specific to after-school activities and extra curriculars
- Closings & Delays – For school closings and delays
- Non-school Hours Emergency – For emergency situations that happen before or after regular school hours
- School Hours Emergency – For emergency situations that happen during school hours
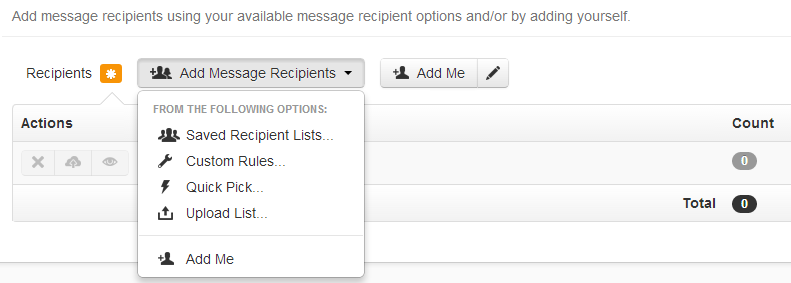
- Select your recipients. You can save some of these as a custom list by pressing
 after adding them to your recipients list. You can preview lists by pressing
- Saved Recipient Lists – If you have created a custom list, you can select that list. You can also select lists that other people have shared.
- Custom Rules – Select custom rules such as “is student” and “is in Boys Basketball” to define a specific group of contacts.
- Quick Pick – Search for specific people by name or ID
- Upload List – Upload a CSV file with a list of contacts.
- Add Me – Add yourself to the list of recipients
- Review your recipients and press Continue.
- Now we will select our Message Content. Click the + button for each message type you would like to use. You can add another type after you finish creating each one. You can select one or all of them.
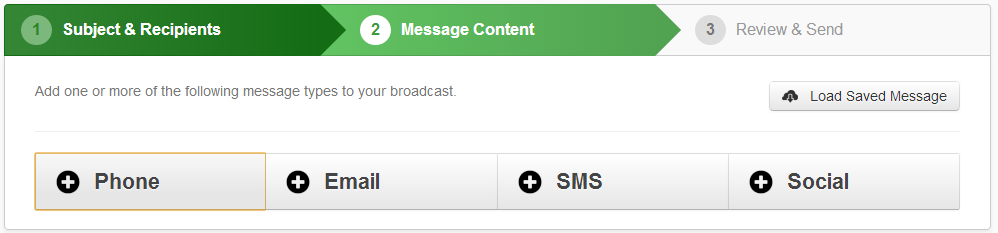
- Phone
- Select the type of phone message you would like to use.
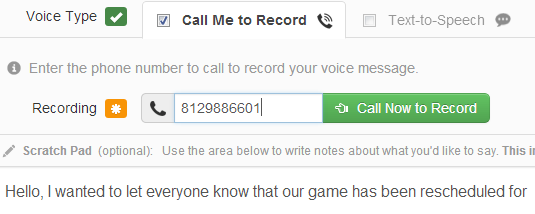
- Call Me to Record will allow you to record a personal message using your own voice. Enter the phone number you would like it to call and follow the phone prompts. Use the Scratch Pad if you would like to write down what you are going to say. Your recorded message will be uploaded and you can preview it before saving.
- Text-to-Speech will use a computer generated voice to playback a typed message. Simply type the message in the box. The
 buttons allow you to preview the message and change the gender of the voice being used. Adding commas, periods, and other punctuation can affect the way the computer reads the message. Altering spelling to match phonetics is especially useful with names of people and places.
- Call Me to Record will allow you to record a personal message using your own voice. Enter the phone number you would like it to call and follow the phone prompts. Use the Scratch Pad if you would like to write down what you are going to say. Your recorded message will be uploaded and you can preview it before saving.
- Click Save Phone Message when you are finished with the message.
- Select the type of phone message you would like to use.
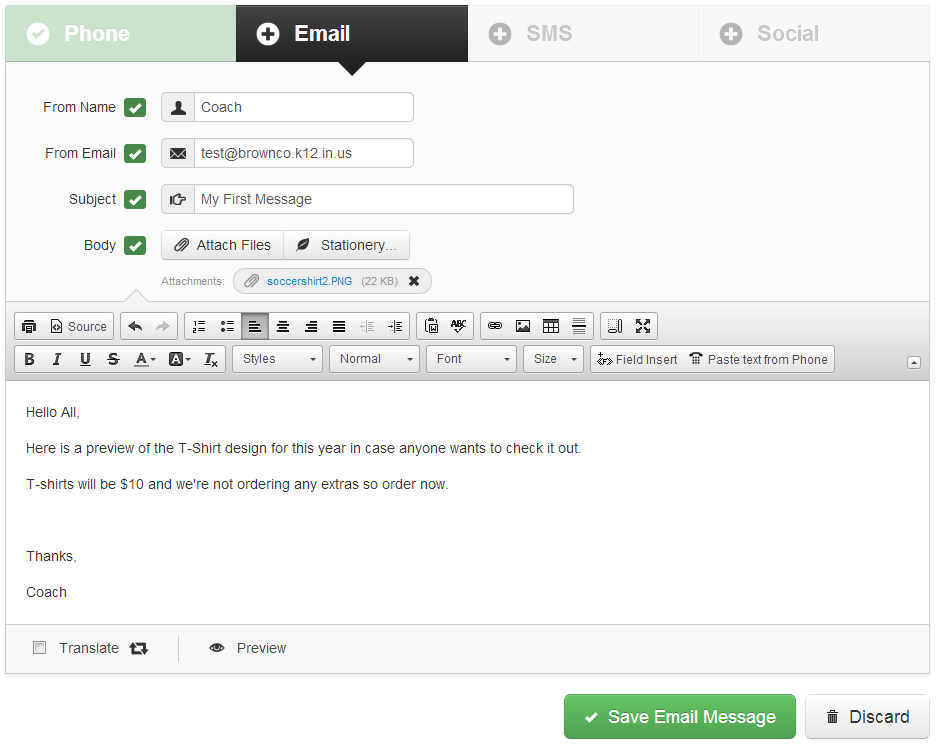
- Email – Type up your email in the built-in email editor. Add styles, attach files, insert images, and more. Click Save Email Message when you are finished.
- SMS (Text Message) – Type in a text message. Make sure to stay under the 160 character limit by eliminating unnecessary words. Click Save SMS Message when finished

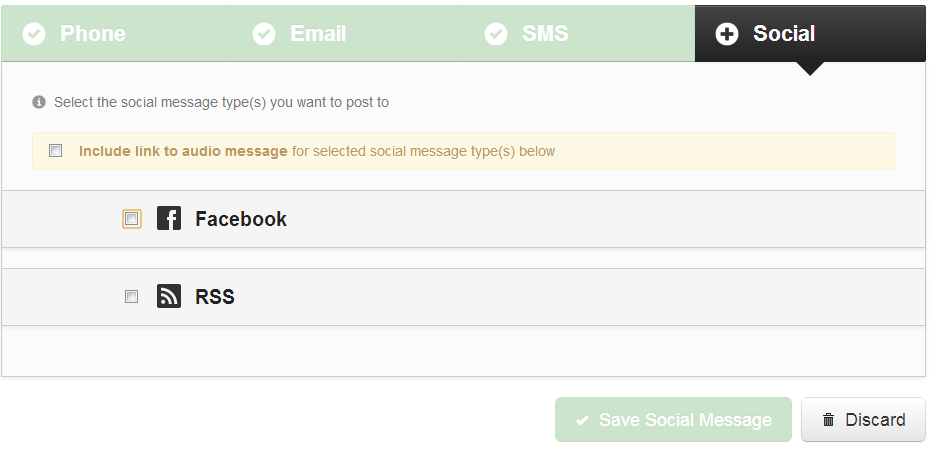
- Social – Post your message to Facebook or an RSS feed. These are only used in certain locations and will be enabled if it is active in your location. Click Save Social Message when finished.
- Click Continue when you are finished adding message types
- Now we will Review & Send the message. Look over the review page to make sure that the broadcast type is correct, all message types you want are selected and the number of recipients looks correct.
- Click Send Now to send the message immediately or Schedule to Send Later if you would like to wait to send the message. NOTE: It is best to schedule general announcements for later to ensure that people are available to answer the phone and to minimize the number of people calling back into the school. People have a tendency to just call back instead of listening to their voicemail.
Creating a List